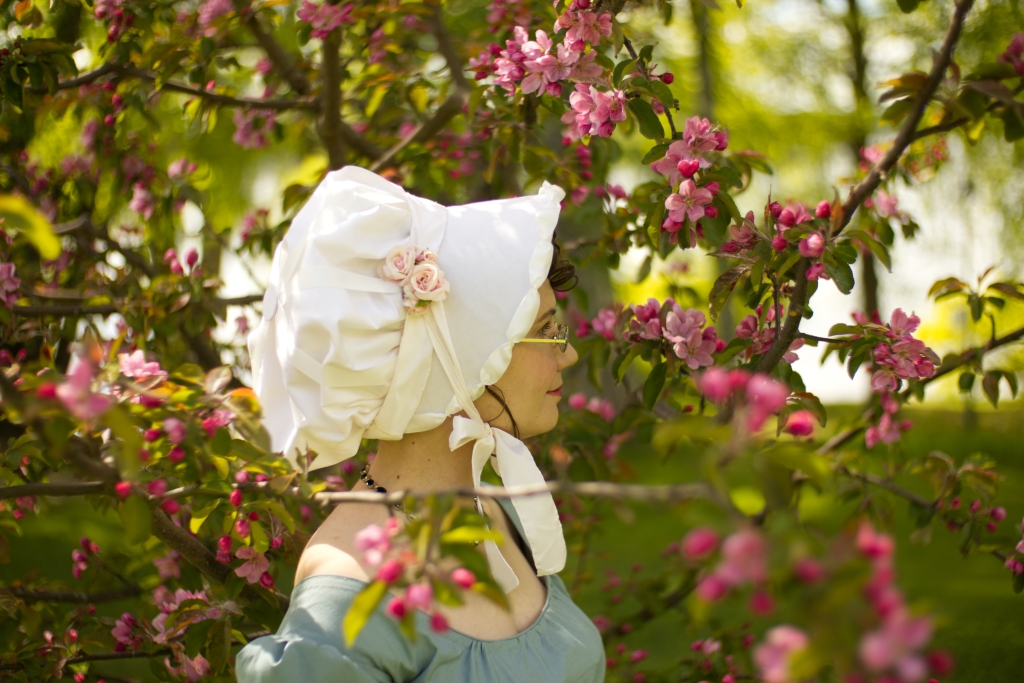
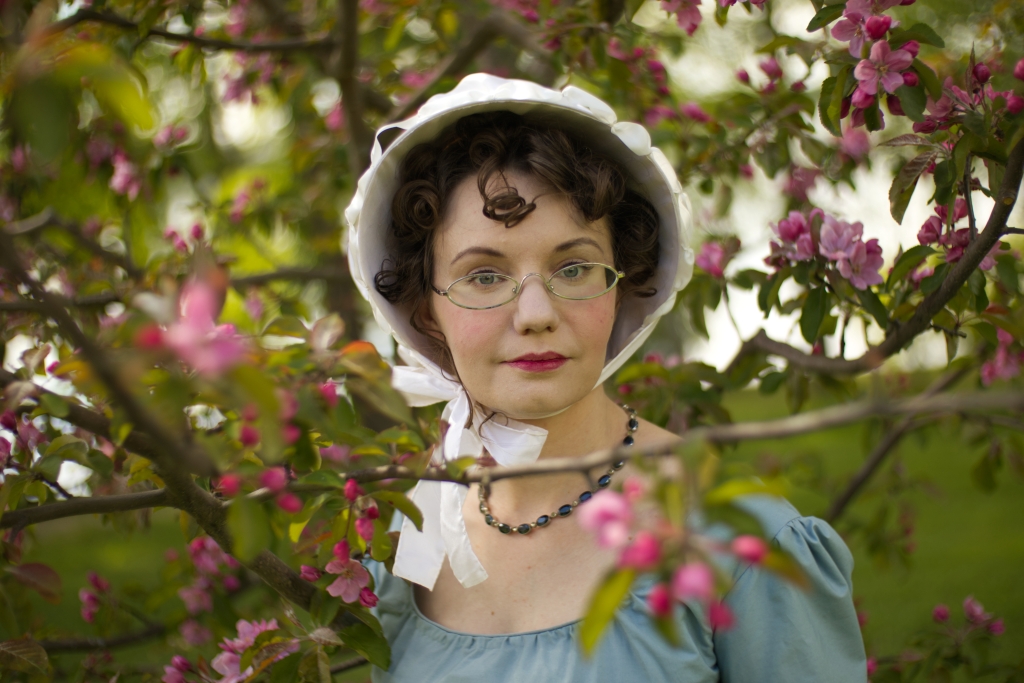
Here is a free pattern for a Regency era bonnet! My version is trimmed to match a fashion plate from 1815 but you could easily change the trimm to suit your fancy. All you have to do is download the pattern press print and make sure you print it as a poster (it will print as 2 pages) make sure scale is set at 100% and print! There will be a clear line were you connect the two pattern pieces to each other, cut out and have fun making your own regency bonnet!
Sewing instructions can be found in my youtube video linked down below. Happy sewing!
Here is the fashion plate that I has inspired by
As for supplies you’ll need to print out and either glue or tape the pattern pieces together and cut the pattern out. Then you’ll need:
fabric scissors or a rotary cutter
1/2 yard of silk fashion fabric
1/2 yard of stiff cotton organdy for the crown lining
paste board or some other stiffening for the brim (I used a ikea mat, linked below)
silk or cotton sewing thread
fine hand sewing needles (I use millinery needles in a size 10)
1 yard of grossgrain ribbon for the base of the decorations
5 yards of silk ribbon
and whatever flowers or feathers you like as decorations
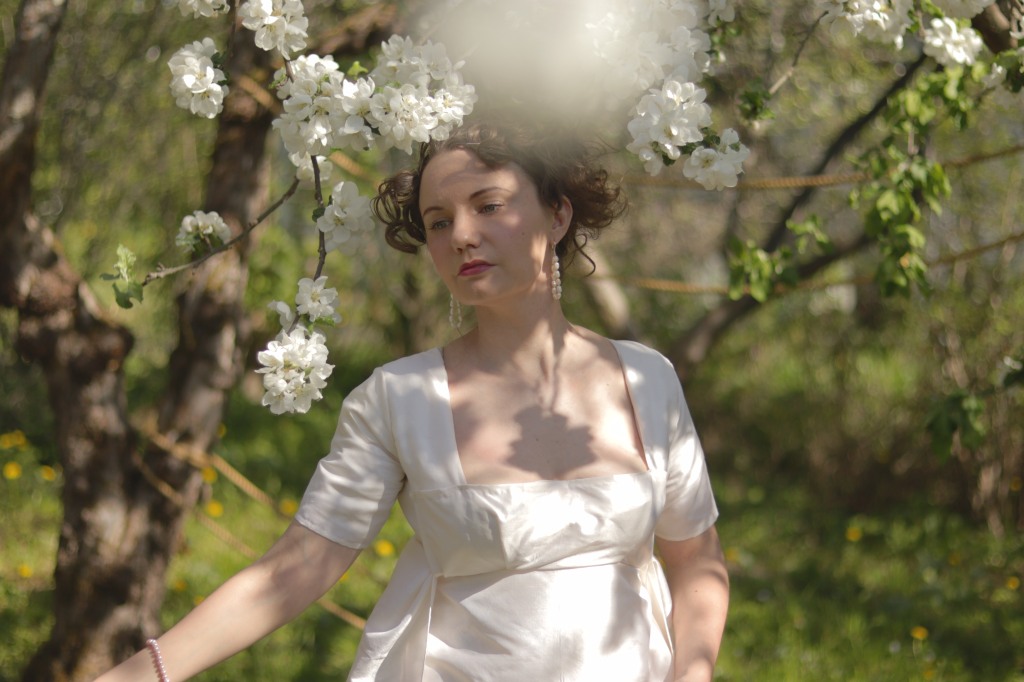
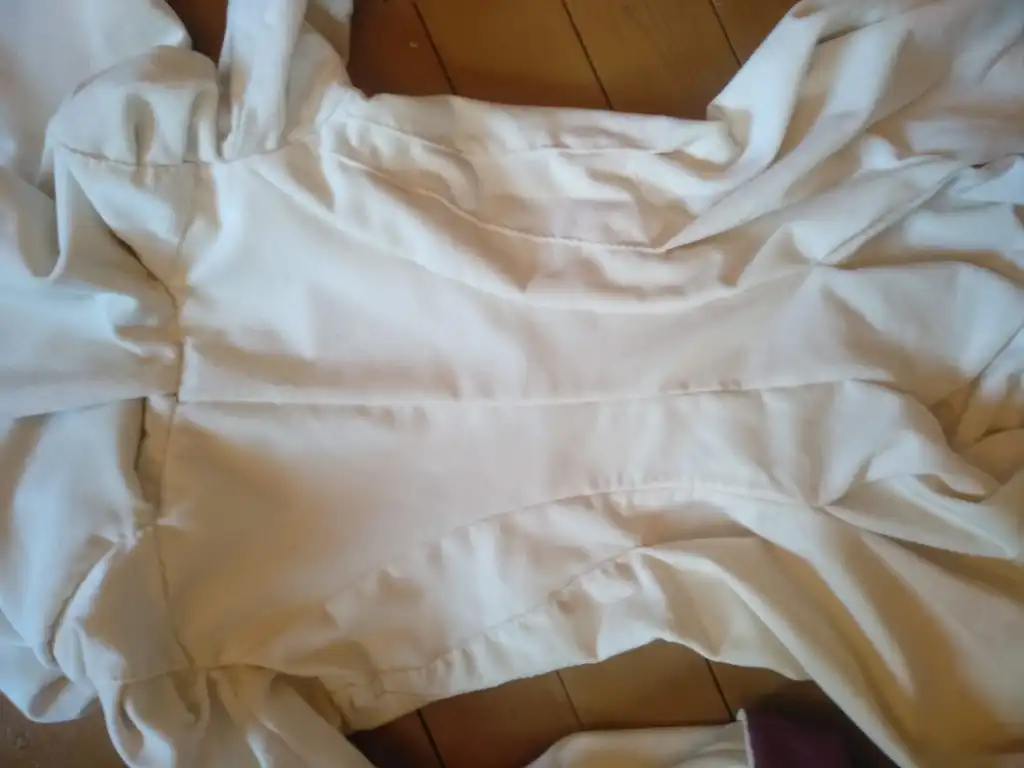
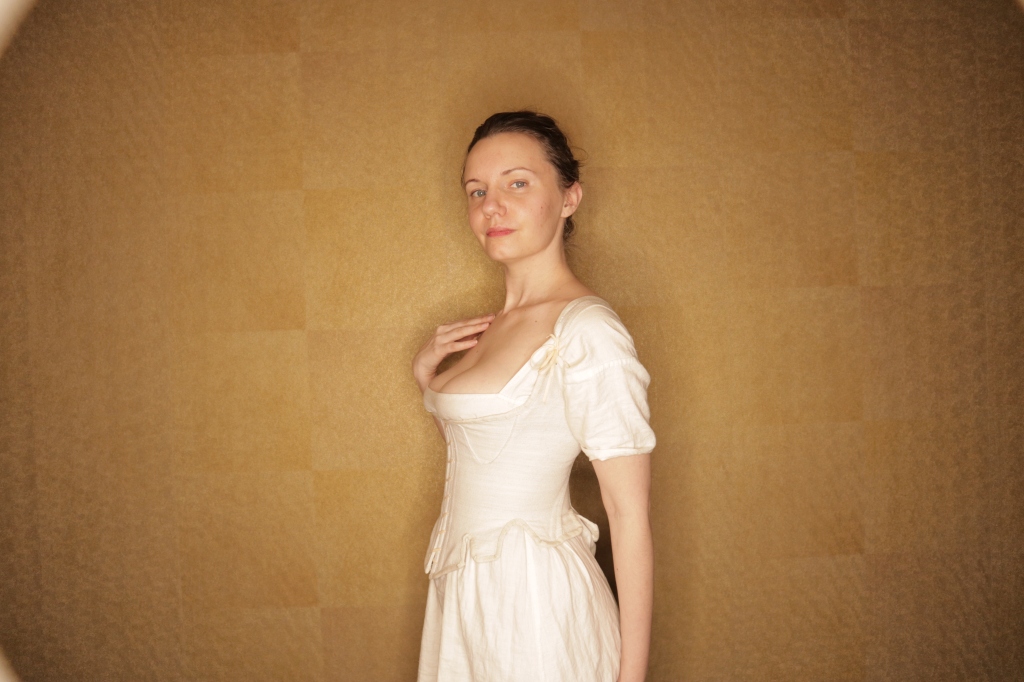
This year I’ve had a bit of a thing for white costumes. I love the clean lines it lends to your look and how versatile it is, the look can be completely changed with accessories! Well thinking of white gowns probably one of the most obvious eras is regency. I found this gorgeous secondhand silk that was exremely lightweight but had a nice crispness to it and so my this years first new project got started.
My pattern is drafted to my size based on the American duchess books 1790s round gown and Janet Arnold’s patterns of fashion 1 early 1800s gown and this painting.
With this one I was feeling a bit lazy since the silk tends to fray if you even just look at it so every seam needed to be finished, I machine sewed the long seams and hand finished everything. The bodice is lined with a light weight linen.
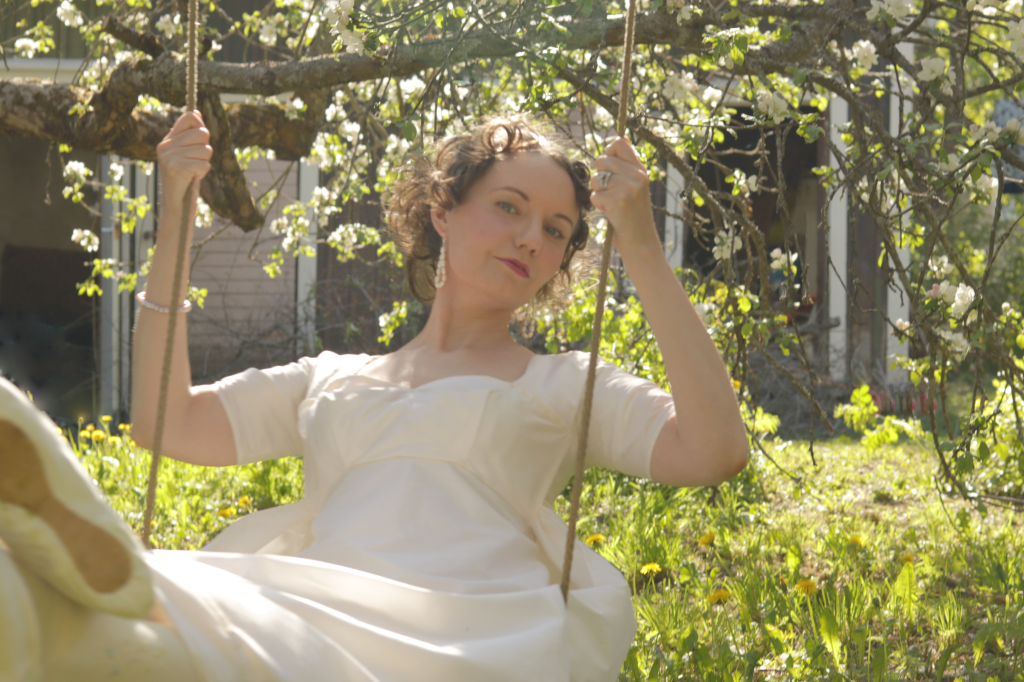
I finished and wore this to a regency dance in February but never got around to taking proper pictures of it so that’s why this post is only coming now. I’m very happy with how this came out. I might still fiddle with the front a bit at some point because the sleek and slightly higher back caused me to need to put the bib front ties under instead of over the gown but my skirts overlap slightly too much causing the front to sometimes pull wierdly as I move. For my bodytype I think the bib front isn’t the easiest gown to fit so I think my next regency gown might be a back closure one.
the fresh water pearl earings are also made by methe center front of the gown pins down creating a gravity defying neckline
Well there you have it for now. I have a few accesssories planned already for this gown but with no regency events in my near future I’ve been focusing on other eras and still will for while…
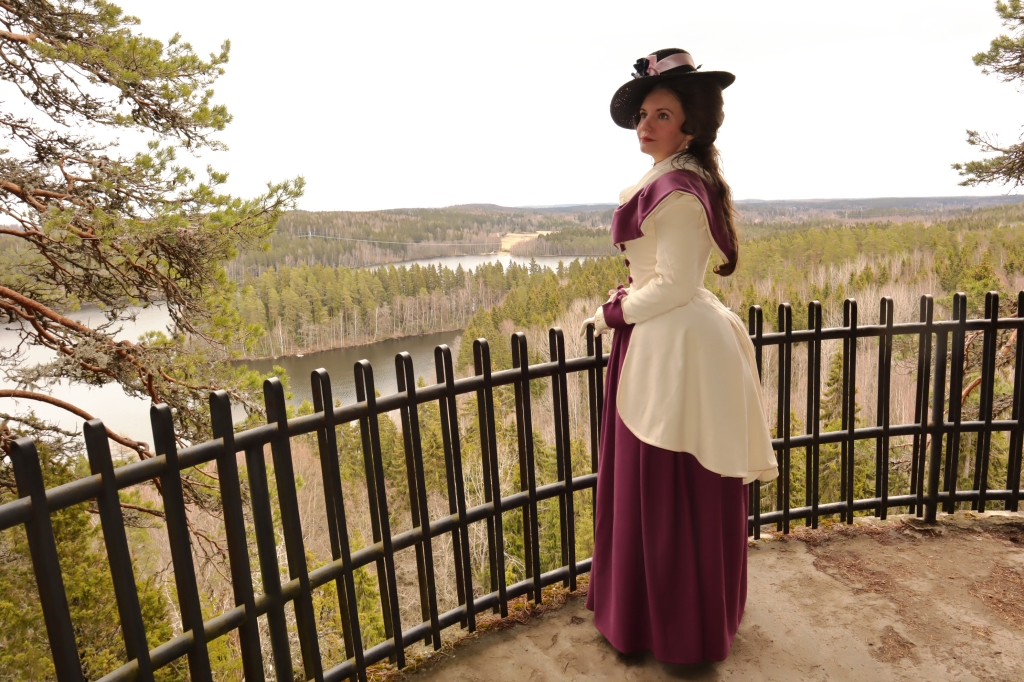
With the current corona lock down I’ve been enjoying wearing my 18th century middle class jacket and petticoat for walks much more than my normal clothes. So that got me thinking that maybe I should make an upper class or more fashionable ladies walking attire also to have more variety. That sent me down a pinterest rabbit hole of riding habits and redingotes, so that now I’m pretty much bursting with 18th century sewing ideas when I really should be sewing 1890s and edwarian! Well this ended with me deciding that I just had to make one now! I have a lovely white cotton velvet I found a few months ago when thrifting so I wanted to make something out of it first but I will have to visit this subject more later with other styles. So these ended up being my inspiration images:
I knew I wouldn’t want it full length because it being white that would take away quite a bit of the practicalaty aspect, atleast for forest walks. As I searched pattern ideas I came across this lovely hybrid polonaise thing and since I love the polonaise and think this is what the black velvet jacket in the painting is I went for it.
My version has a straight edge on the collar and is based off the collar in the pattern of fashion 1 1780s van dyked round gown. Also my sleeves are my own creation that changed along the way to a cuffed style. Starting out I had no idea what I’d use for the petticoat but looking at those pinterest pictures I liked the combo of white and purple though I normally steer clear of anything purple. I had a bolt of new old stock purple wool that I’m also using for my son’s new 18th c suit so I desided to use that for the petticoat. The collar needed to be lined as the underside of velvet is not so nice looking so I went for a contrasting collar lined with the velvet and covered buttons so that lead to it being logical to have contrasting cuffs too. I’m not sure at all if they are constructed in any accurate way because I still kept the slits from the sleeves in the painting along with the cuffs.
All in all I’m happy with how it came out other than that collar. The patterns of fashion one has a drawstring to pull in the edge in and then it is pinned to the top of the gown. I liked the idea of it but probably because the velvet underside is a bit stiff it doesn’t draw in as smooth as I’d like and the pins work their way out of it easily so I think I’ll go back and whip in on in the front gathering it to fit the neck. The other thing is I’ll need to find a ribbon for looping onto the buttons as with the forward thrust of the style the hooks and eyes gape a bit at the top despite the boning at the the center front seams.
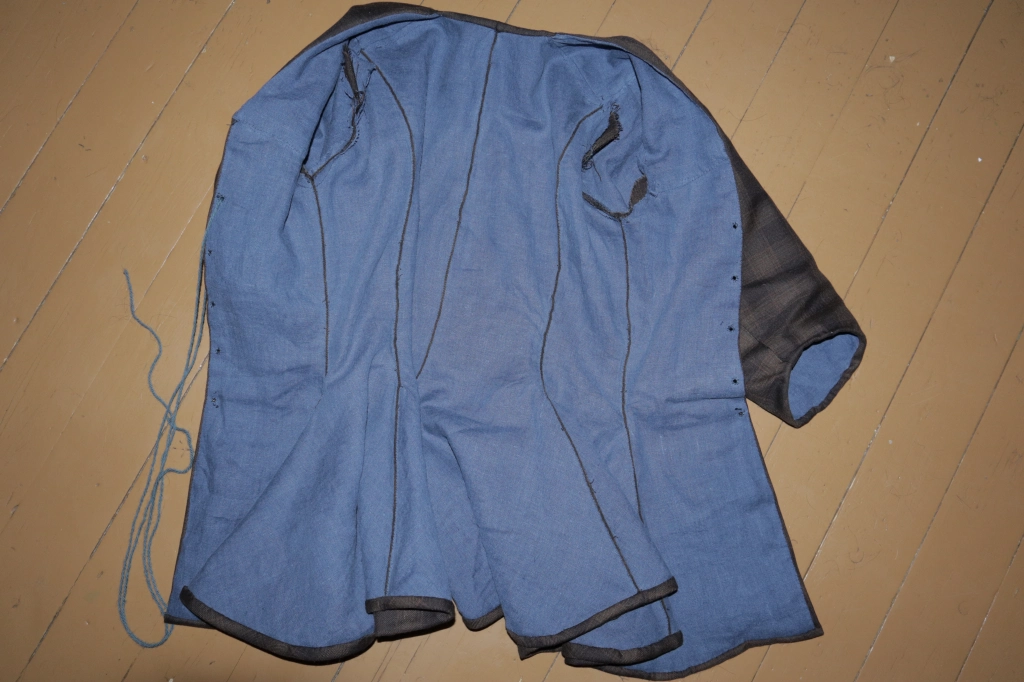
and now for the goodies! guts pictures (sorry for the quality I forgot to charge the proper camera):
The Lining is my basic italian gown pattern, I still need to turn and hem the center back pieces and fell the velvet down to the pleats. sleeves are lined with kids old bedsheets, the bodice with an old linen towelhere you can see the pleats at the sides that are just top stitched downAll seams are felled down separately to reduce bulk and the back pleats are whipped together at the top to keep the velvet from shedding
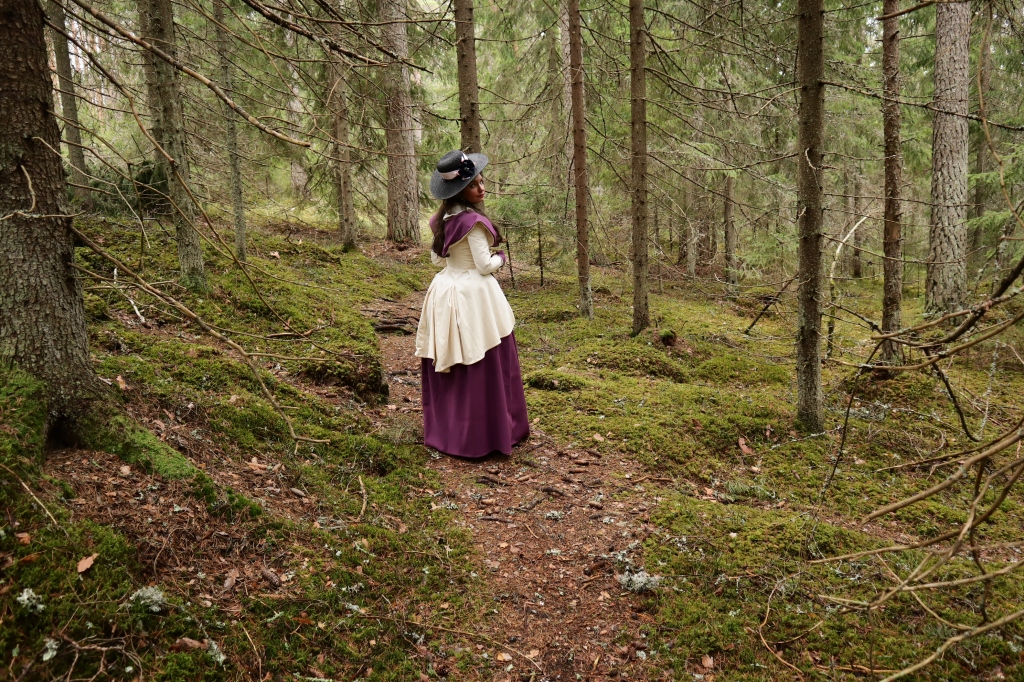
I Think I need to still make the lace tucker from the portrait for this at some point and my hat still needs work, this was just quickly done the morning of our walk. Now I’ll leave you with the picture galore!
Till next time!
xxx
shoes are American duchessI really like how my hair turned out for these
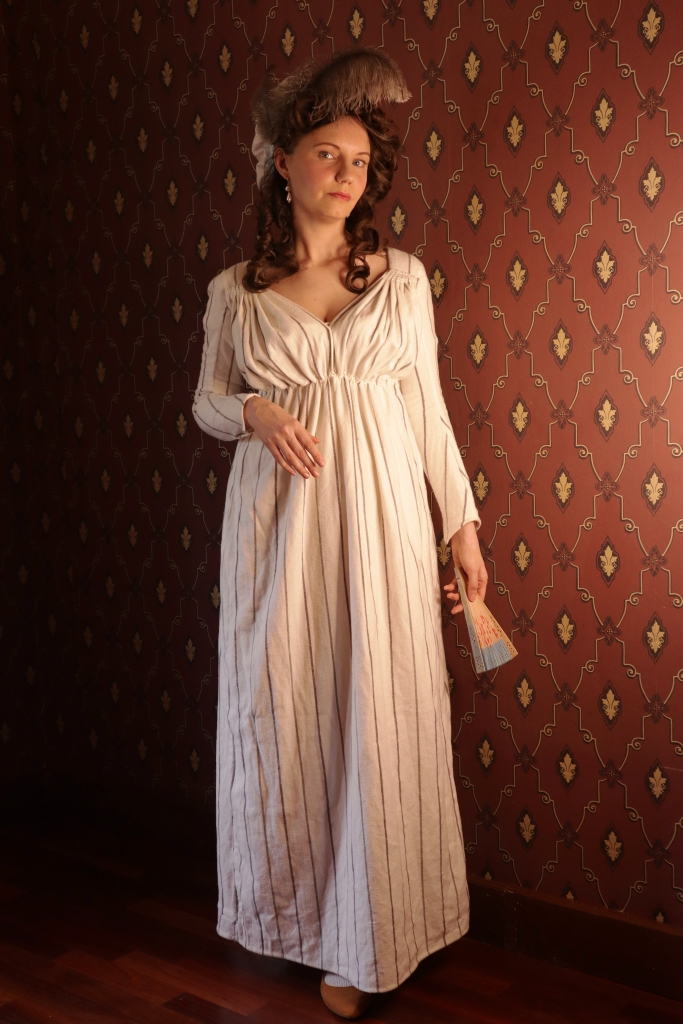
After making 2 regency gowns from the 1800s (the other one’s blog post is coming up soonish) I really wanted to make something from the early directoire or french revolutionary years. I’ve come to love regency empire waist siluetttes and really lose that voluptuous look of the late 90s were the waist is really high and the front is full aswell as the back.
A Little after christmas a local fabric store had a sale were there were grab bags for 5 euros and among the fabric there was this softest stripe flannel that actually didn’t seem horrible quality like most modern flannels and some gorgeous wool twill so ofcourse I filled my bag with those. This flannel just screamed lunge clothes to me so I figured I’d kill two birds with one stone and make a late 1790s gown out of it that would work for costuming and loungewear. Since this is a piece I’m going to be using mostly at home and I’m not exactly sure if flannel in any other form than wool and that for underthings even existed at the time I was not going to bother with hand sewing this one. Visible details are hand sewn though. I used the American duchess quide to 18th century sewing for the basic pattern shapes drafting it straight to my size. The bodice is lined with a sturdy medium weight linen to give the soft flannel a good anchor point. The thickness of the fabric did give me some trouble when figuring out how to make the v shaped front and to reduce bulk I left the shoulder straps a separate non pleated piece. I also made a little oopsie cutting the train and had to piece the side backs a bit longer but luckily piecing is period.
here you can see the piceing at the hem
I’m not going to go into much construction as it’s not really accurate and the accurate bit are in the book. i sewed the lining pieces up and made sure everything fit and added bust darts and the sewed the fashion fabric on, cut the skirts, attached them to each other and attached the skirt back to the bodice with cartridge pleats, attached the sleeves and last attached the bodice to the front making sure not to catch the waist ties as I went. The front bodise bit is just a rectangle and the upper bit is pleated into the width of the shoulder strap then the pleats are sewn down for about 2 inches and then it is attached to the shoulder strap and the bodice at the side. The front only closes with pins at the lining ang the drawstring under the bust. If like here I’m not wearing it with any sort of kerchief around my neck or a chemisette I can pin the v to control the amount of cleavage that is being shown.
This really is the most comfortable dress ever and due to the adjustability work also without stays for lounging around the house.
I’ll leave off for now with thses pictures. Till next time!
xxx
The mandatory regency weggie pose 😉 I’ve been waiting to be able to do this one!
The 1790s was a transitional period, going from the 18th century conical shape to the softer rounder and hish waisted regency fashion. With all this change in siluettte came also changes to the under garments, my 1780s stays would give a too conical shape and my regency stays too much roundesss and separation for this specific siluette from about 1795 to 1799 though I could also wear these stays with my early 90s chemise gown (more on that coming later once I’ve gotten pictures of it). This period was so experimental that all the extants I’ve looked at are vastly different from each other in shape, amount of boning and even in the siluette they give. Looking though the differnt options I decided to make the 1790s linen corset from Corsets by Jill Salen. The reasons why I chose this pattern was that it looked fairly simple, was not one of the super short ones that I find uncomfortable and it just so happened that the original owner of these and I were pretty much exactly the same size other than me having a much larger chest. I just chaled the pattern up and made the bust dart bigger and went right onto sewing.
I used a fairly thick handwoven linen twill repurposed from a vintage towel and the boning is 5mm synthetic whalebone at the back and sides and heavy duty zip ties at the bust. I love the fact that this is front lacing so I can put it on myself, it just makes life so much easyer when that pesky maidservant is nowhere to be found. 😉
The only real changes I made to the original besides making the bust gore bigger was lengthening the straps and swithich the lacing to the front because I just had no idea what was going on with the originals there. I also left the other pair of boning fron the center back pieces off because it just seemed unnecessary.
Most of my historical clothing tends to be more high fashion fancy looks, mostly beacause I do costuming not really historical renacting. Or atleast I haven’t done any renacting but who knows what the future will bring… but I have no current plans on doing it. The thing that really got me originally hooked on 18th centure though is how wearable the clothes are even in modern life, were as my teenage fantasy of a gothic bustle gown is’t very practical. So I have wanted for sometime to do a easy to wear more lower class outfit, something that could transition into my everyday closet aswell. I started this project during the christmas holidays as a quick sew but then the fit was off and other projects that were on a deadline pushed this one to the side. Then corona came along and all of a sudden there were no deadlines, so great time to finish this project!
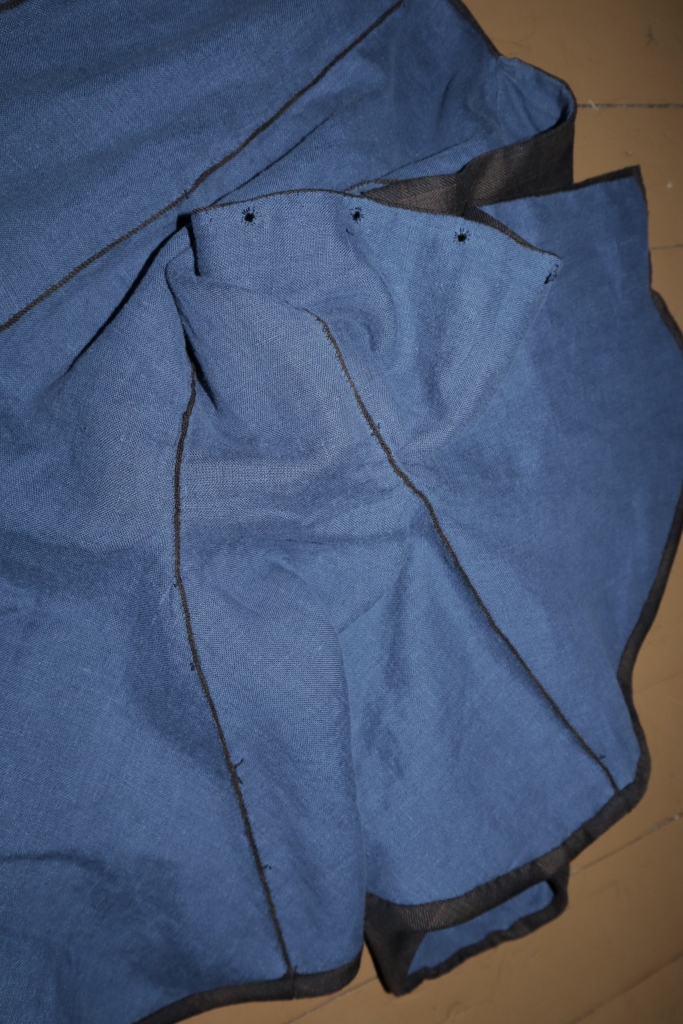
The jacket is is wool lined in blue linen and the petticoat a wool twill that I didn’t quite have enough of so the back is pieced at the top with the linen I used for the jacket lining. It actually adds a nice bit of fullness and along with my natural lower body shape gives me a great siluette without any padding.
the fabrics are connected with a mantua makers seamthe linen piece is about 4 inches long and the fabric was slightly more narrow that the wool so there is also a bit of width pieced
The front of the petticoat is pleated regularly and on both pieces the linen waist tapes are sewn to the underside of the petticoat. The side seams being selvage edges are just running backstitched together untill the pocket slits.
For the jacket I thought I’d take the easy lazy route and used the jp ryan jackets pattern instead of drafting my own. I made the 1760s version as I liked the legth and the stomacker but omitted the cuffs to make it work better with the slimmer sleeve fashions of the 70s.
Well it turned out once again to actually not be any quicker as the pattern is made for machine sewing and has built in seam allowance that is just way too wide when you hand sew with the english stitch. If you aren’t familiar with this stitch I highly recommend it for any seams were there is a lining and fashion fabric as it seams and finishes the edges on of all layers in one go. Since I was being lazy I didn’t bother with a mock up, I mean it was a stomacer in the front, it’s easy to adjust, what could go wrong!? Well turns out that the one thing since I already had cut the straps separate to avoid fit issues the only thing that could really go badly wrong was the back fit and waist. They both did go wrong. So after ripping my seams at the correct places, cutting it down and resewing it finally was done!
I love the amount of skirt flare in this patternthe sleeve edges are left raw as was typical for the era
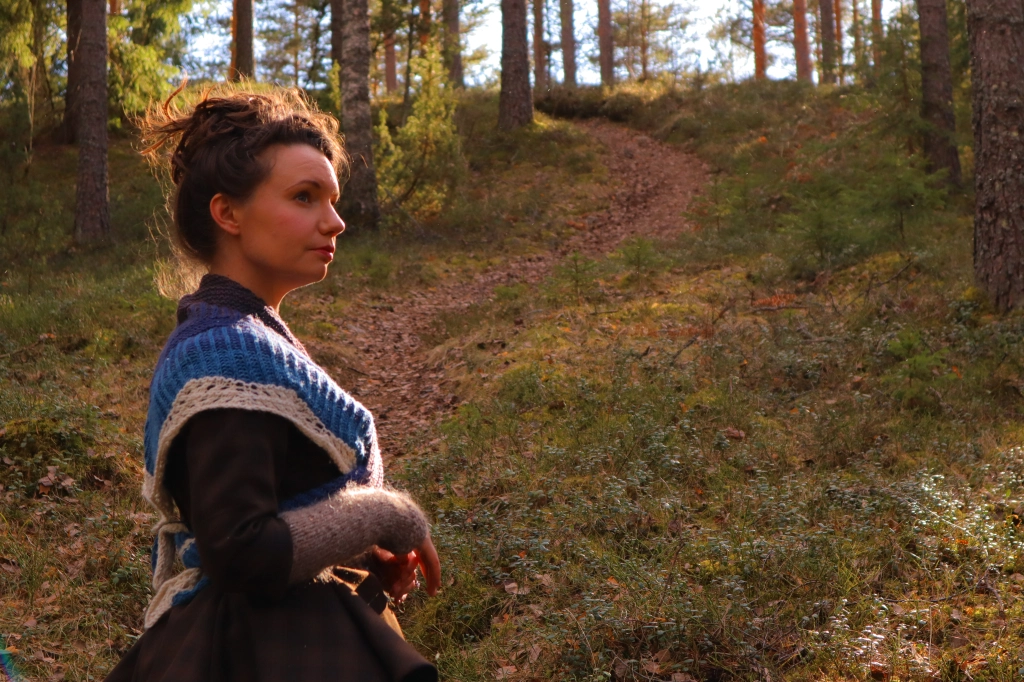
I did two photoshoots with this outfit, one Outlander inspired as the jacket wool reminds me of Claire’s style and the books really inspired me to actually make an 18th century outfit in the first place. In the other pictures I tried for an authentic look but I’ll leave it to you to judge how well I succeeded in that. The apron was a true seed sewing project done in an hour and a half just before the photoshoot and is made out of the same linen as the lining and the top bit of the petticoat. In both pictures I’m wearing my 1770’s to 80’s stays, shift, stockings, garters and one underpetticoat underneath the outfit, no extra padding, though in the outlander ones I’m wering my thicker flannel under petti as it was near freezing that day and in the more authentic ones a thinner though still rather hefty linen one as it was a wamer spring day.
p.s. if you spot the shoes in either pictures ignore them, I was planning on ordering a more practical everyday pair of 18th century shoes this spring before this happened as my only pair are white but now it’ll have to wait for things to get back to normal.
Here are the middling sort or what we would call today middle class pictures:
And now for the outlander styled ones!
The shawl is knitted with indigo dyed merino wool and natural white alpaca. The mitts are knitted out of Icelandic lopi wool.
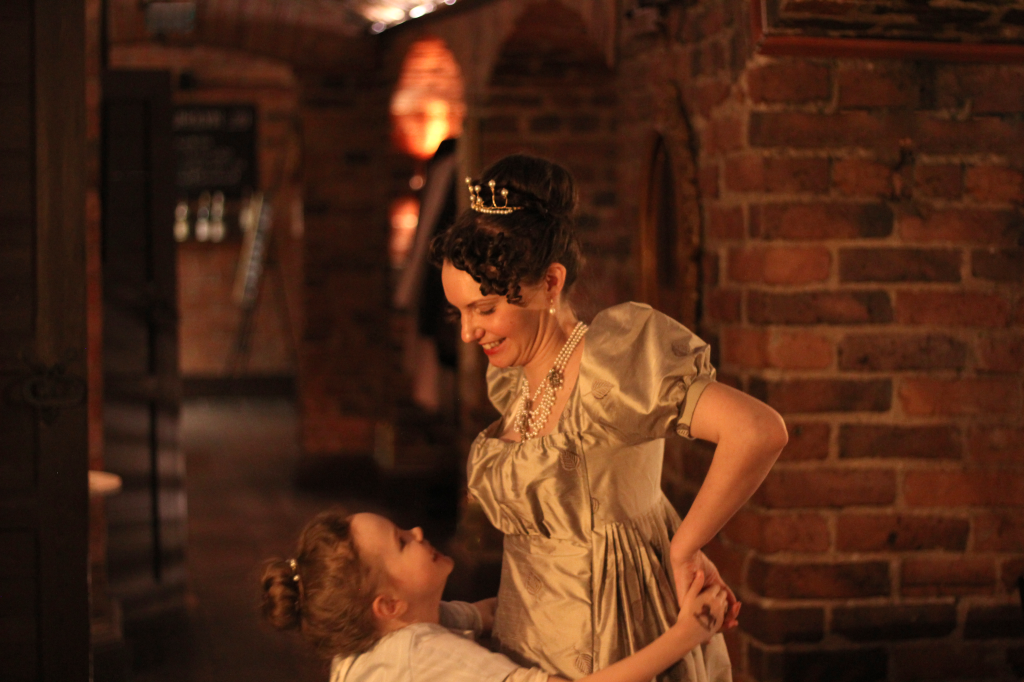
We had a historical dinner this past weekend and I finally got to take some good pictures of my regency dress so that I can finally share it with you guys. I made my dress last August for a small regency dance. The fabric was again a lovely secondhand find, an emboidered silk. It’s slightly more slubby than I’d like it to be and the embroidery isn’t really accurate but since it was cheap I figured it was a good trial piece. I’ve always been a little worried that the regency siluette wouldn’t be the most flattering on me since I’m fairly short, very short backed and though I’m slim I’m very curvy. My dread comes from those modern empire waist gowns in which I always look pregnant. But as I’ve come to find that really doesn’t happen with regency at all!
My inspiration was this dress from 1809
I used the laughing moon bib front dress pattern and I have to say I’m really impressed with their way of patterning. As someone who’s measurents are far from standard the way you can mix and match sizes with their instructions make using patterns easy for me and for once I think I actually saved time using a pattern and not drafting my own. The only change I made was making the back slightly more full and pleating it the entire width of the back not just partially and changing it so that the front ties under not over the back piece giving it a cleaner look in the back. I made the slightly gathered bib front and it is pinned on at the top. Here is the finished result. The only thing I’d do differently is I’d make the bib fitted and still might at some point as my silk has a little bit too much body to it for the gathering. Then again that does lessen the boobs in your face effect so I might leave it as it is. All in all I’m very pleased with how this came out and I feel like an absolute princess wearing it! There will most definitely be more regency gowns in my future!
For this dinner I wanted to have a regency style tiara and desided to try my hand at making one. There are some tutorials in other blogs for making them out of lamp binding and that was my initial plan but ofcourse I left the buying too late for online shopping and apparently it isn’t sold in any stores anywere near were I live. My plan b was to make it out of brass wire and some plastic pearls but after several failer attempts I had already kind of given up. My instruction book told me to get a 0.8mm wire but all I could find was either a 1mm or a 6mm so I bought the thicker and with my lack of skills and slightly bent round pliers it just wouldn’t bend with any kind of consistency and everything looked very uneven. Then on the morning of the dinner I managed to find some thinner wire I had bought earlyer and my newer non bent round pliers. Now don’t ask me why I had previously bought so many supplies and yet have never actually worked with metal wire before, I have no idea but apparently I’ve had some plans at some point. Anyways now things worked fairly well and took shape quickly and in a few hours I had a wearable tiara. It’s not perfect and it’s slightly crooked but it looks pretty good on and I’m happy with it as my first piece. I’ll have to practice a bit and then maybe try making one out of natural pearls and a precious metal.
I also made my daughter a regency dress for this dinner but since it will still get an open robe to go with it later I’ll write up the details on that one later. For now I’ll leave you with these lovely pictures my husband took…
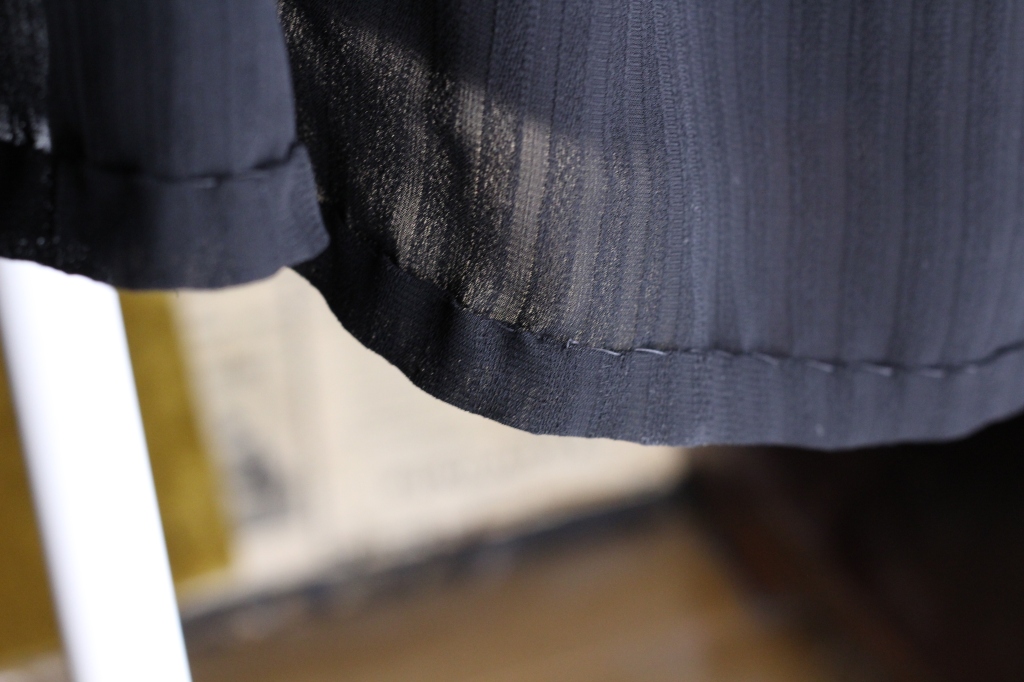
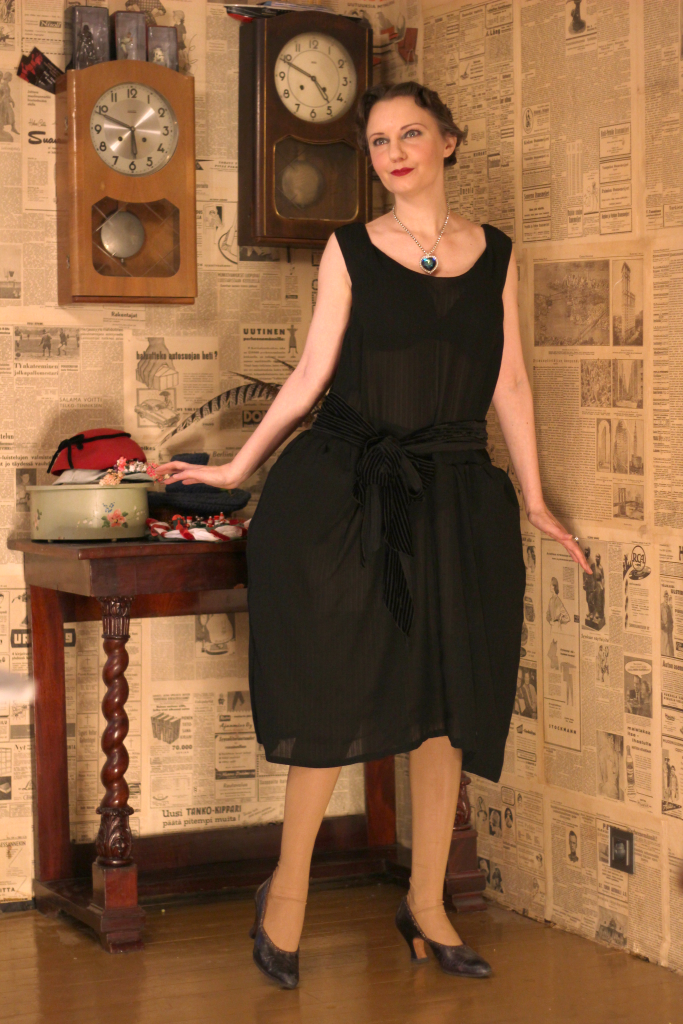
The kids and I desided to have our own little new years eve party at home and since the twenties started again I took advantage of the situation and made a robe de style dress that I’ve been obsessing about for some time now. I really would have wanted to make either a velvet one (I’ve been obsessed with everything velvet lately) or a fancy lacy one but I didn’t have the right kind of fabric for either of those and I desided to make this entirely out of things I already had I went with a semi sheer stripy black wool rayon blend vintage fabric I had. The fabric choice did lead to me having to buy one thing though, black zip ties, I only had white and they would have shown through.
I thought I’d use a pattern I’ve used before for this era as the basis for the bodice to make it quicker and save me from bothering to measure things. That turned out to be totally the wrong choice since I forgot I’ve lost weight since then and a robe de style is a slightly tighter fit really than 20s dresses usually. Ofcourse I din’t notice this untill it was all sewed up skirts and french seams and all! Well luckily I had a black vintage velvet and organza striped scarf I could use as a belt to draw it in enough to look good on my body. The second mistake I made was make the bodice bit too long so there is a growth pleat on the inside and the dropped waist, Oh well it works!
The bodice pieces are basically just straight that should have slight ease maybe like a an inch bigger that your bust measurent would be good. Mine is with my hip +ease and it’s too much and should end at about your hip bones or very slightly below depending on your body type. For me my high hip at my hip bones is pretty much the same width as my bust so I don’t want to go any lower than that. If too tight at the hip and give a muffin top belly, if too loose the hoops won’t be supported by your hips and it’ll be sad and droopy.
Side seams are french seamed and all edges narrowly turned and hand hemmed. Shoulder seams are flat felled after turning the necklines and armpits.
I made side hoops much like 18th century ones but smaller and those are pleated and then sewn on to the dropped waist. My hoops are about 16″ by 9.5″ and the casings for the zip ties are at the bottom edge and 4.5″ inches up from it. The bottom is held in the correct semi circle shape by a 8″ tape.
The bottom is just the full width of my fabric (38 inches) times 2 with a 4″ dip at center front and back to keep hem level over the hoops. The bottom edge is then turned up and hand hemmed.
This was a fairly quick project though the fact that the fabric required everything to be either hemmed or french seamed did make it less of a straight forward easy project than I thought it would be and ofcourse my own silly little mistakes. All in all it turned out lovely and we had a good time trying to learn the charleston and making our own mocktails and staing up way too late.
My daughter is wearing a true vintage 1920s silk dress and my son vintage pants and suspenders with a linen shirt I’ve made for them
Now on to new things and finishing up some older ones…
I’ve been wanting to do a romantic era dress for a while now. The sillyness of the huuuuge gigot sleeves along with the pooffy slightly short skirts just really speaks to me. So when an excuse came up I jumped at the opportunity. I had this glazed cotton stripe fabric remnant bolt I bought a while ago that I thought would look cute in this. Unfortunately that was a very very bad choice because it ended up being nearly impossible to sew and though the red is a good shade for me the yellow really isn’t and it really washes me out. I still love the era and want to revisit it but I’m kinda still done with this dress.
This was my inspiration and my concept drawing
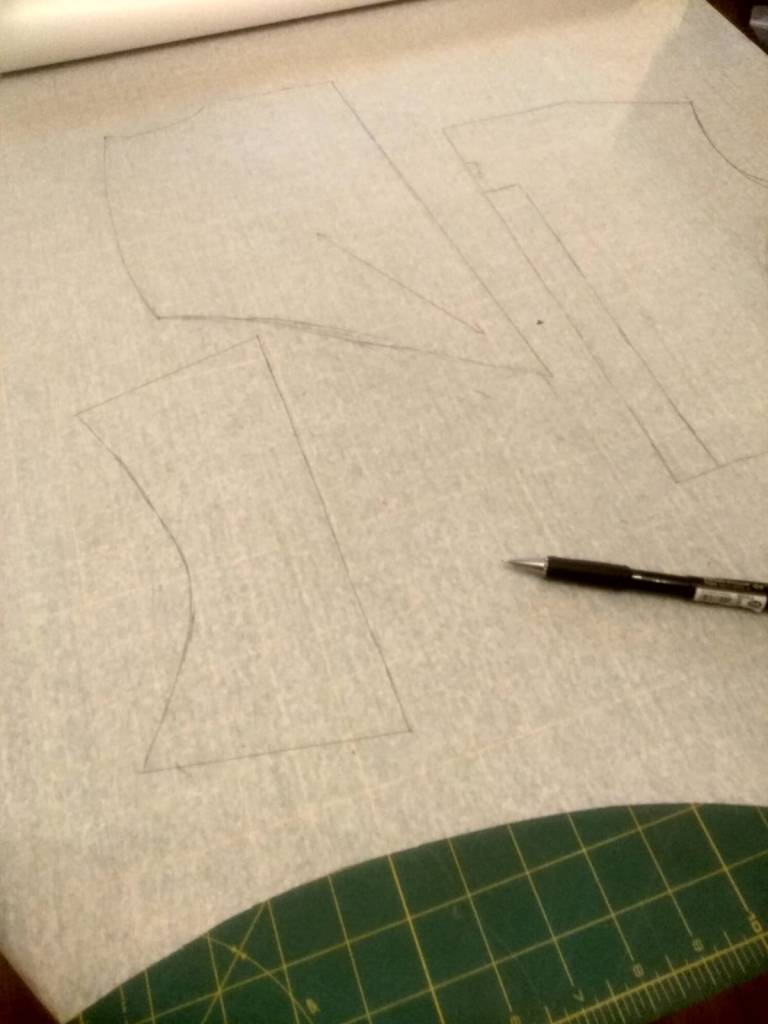
I watched the american duchess youtube videos on the 1830s and read bits of the work woman’s guide on google books and drafted my pattern based on those. The sleeves are straight from the work woman’s guide, they are basically a full circle with a cut to make the forearm bit.
my pattern pieces drafted I fitted the bodice on by basting the center back were the closure is going to be shut and pinned the front center to the correct shape and pinned the darts on. In this era the darts top stitched on so this is the easyest way to fit them.
First I machine basted the bodice up leaving the center front open. After fitting everything I ripped my back seams open and resewed them with piping and sewed the front closed with the piping. Now after doing this I found out that apparently historically they were usually piped on top but I’m still not sure how so for me the modern way is good enough. The sleeves are the point were my troubles really started and were I began to hate this project. To fit all that sleeve in the tiny piped armhole I cartridge pleated the sleeve but because the fabric was so impossible to hand sew it endeds up really sloppy and took forever to do. Also because of the piping my stitches ended up far wierd and showing from the right side so I needed to sew another set of stitches keeping the pleats with the piping edge but apparently they didn’t end up well enough through the fabric and ripped out so I’ll have to redo them.
Here you can see I couldn’t event fold down the fabric for clean edged pleats because my needle just wouldn’t go through
Then with the bodice ready it all gets attached to the waistband and the skirts get sewn on to that edge. Here everything looked fine but apparently having just the bodice be short waisted and have the waistband come to your natural waist is not high enough, the actual waistband edge should have come slightly higher that my natural waist. Luckily most of the bunching from to too long waist is hidden by the belt that is worn over the gown to show off that belt buckle but it still annoyes me and in future gowns I’ll do it differently. This one I will not fix! I decided to make my life easyer and pleat the skirt normally so that I could machine sew it. The problem with that was that at most parts that meant there was atleast 5 layers of this beastly fabric to sew through and my poor sewing machine needles just couldn’t take that! I ended up having to slowly hand crank the entire waist on and still broke 4 needles and it took like 45 minutes to sew on.
The back closes with hooks and eyes and it has pocket slits at the sides just like an 18th century gown. After sewing on the waistband I put this dress on a nearly month long timeout and did other projects but still it was not really reconsiled me to it and I think I’ll just make another gown to wear for next time out of some material that will play nicer.
As you can see from my drawing I was planning on making a black pelerine to wear with this to help with the not really being my color at all issue but with all the sewing projects this season I ran out of time. So off to pinterest I headed to look for quick solutions to my problem and found this picture:
I have a vintage 70s or 80s muskrat fur that had broken a bit and was also too small for me so I had cut it up to make things out of so I cut the collar off that, whipped the edge shut with buttonhole thread and added velvet ties. Not only did it work perfectly with the dress but also with my riding habit coat that ended up being partly unfinished because I ran out of time. The same fate befell my bonnet, only the brimm was finished and I just quickly tacked on a temporary crown to it to make it wearable for the event. So I’ll share the bonnet and coat at a later date after they are in their full glory.
We had a fun event and I’m once again very much in love with this era but still really don’t like this dress much eventhough I had lots of fun wearing it. We shall see if I’ll like it better in a few months or if I’ll just end up making a new gigot sleeve dress soon.
My hair also ended up oddly flat because my bonnet crown was too small I had to leave my bun slightly too lowHere we all are, our little power puff girl gang!
Well here you have it my first play in the 1830s! Now onto new and hopefully more succesful things. Till next time!
Since my fall/winter time was already packed with sewing projects I thought it would be a good idea to hand sew a sack back gown for the first time for the Yule ball last weekend. My original plan was to make a quick and dirty machine sewed version out of ikea sheets as a sort of practice one for the ball and later make a proper silk one when I knew what I was doing and was not rushed… buuuut then I found the perfect silk. And it was cheap too! So yes I had to make it and make it now!
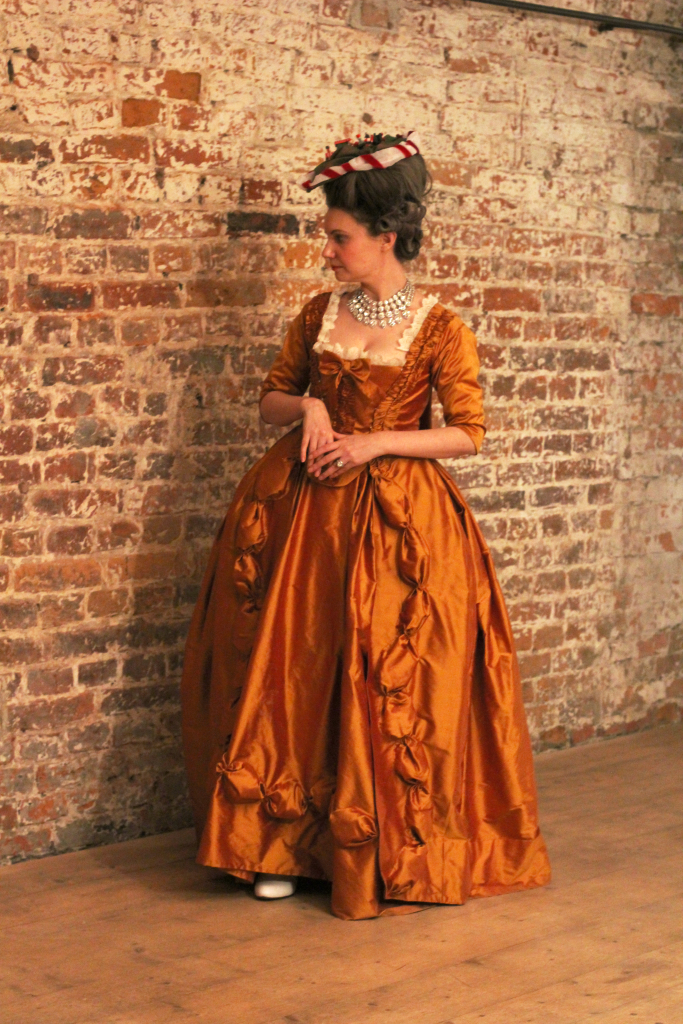
My plan had always been to make a 1770s sack as that decade speaks the most to me as far as the sacks evolution goes. Things are a bit lower key as far as trimm goes, the siluette is already quite narrow compared to earlyer ones and there is alot of experimentation and other gown styles seeping into the sack aswell like closed fronts, untrimmed or lightly trimmed sleeves. Since my silk is a gorgeous metallic irridecent copper and purple I wanted something that would really let shine the fabric and the way light plays with it so I wanted to do the stuffed puff trim rather than the more typical ruffled trim. This was my main inspiration picture:
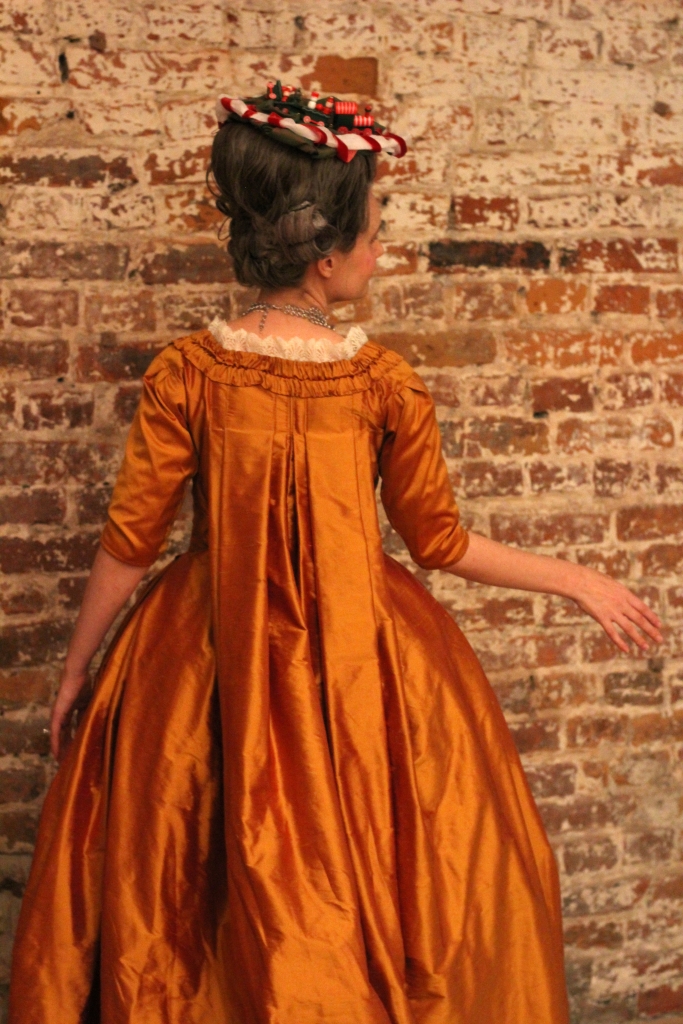
The one thing I wanted to do differently was that I didn’t want the compere front but the earlyer stomacker style. The simple reason for wanting this was that I’ve been starting planning on a new pair of stays for this era. The previous ones I made this summer were made just as I lost a bunch of weight and things ended slightly wierd. The overall siluette is fine but many things could be improved and since I get zero reduction in my current stays and I plan on getting a small reduction (no tight lacing just a more snug fit as I’m quite squishy) in the next pair. The stomacher front will help keep the fit good for the new stays.
This fall I’ve been working on a polonaise gown with the help of an incredible mantua maker Brooke Welborn https://www.facebook.com/bwelborndressmaker/ she is the manager of the historic fashion workshops for Burnley and Trowbrige, if you have a chance to take her classes I’d highly recommend them and hope to one day be able to. Not only has her help been invaluable with that gown but she also helped me realize that really everything in the 18th century is basically just getting the lining right and after that it’s just playing around with fabric ontop to get the shape you are going for. I mean I technically knew this but to really understand it took away my initial fear of the francaise. I used the American duchess guide to dressmaking https://www.american-duchess.com/book/american-duchess-guide as my guide and drafted my lining to my measurements
I first machine basted the lining pieces together to check the fit and then ripped it open and sewed everything by hand according to the instructions.
The back pleats were a little difficult to wrap your head around but after reading the instructions like ten times and watching you tube videos of others making them I finally was able to figure it out. The actual making up part was easy after figuring out how to fold them correctly.
After the pleats were pinned down I put the lining on my doll and pinned the fashion fabric on it
After sewing down the pleats came the most scary bit of the entire project. You just have to trust your pinning and cut the excess off and square it off at your waist. I’m not sure there is actually much that can go wrong here but it still was very scary knowing that if this went wrong I wouldn’t have enough fabric to redo the entire thing.
excuse the poor quality phone pics my camera charger was temporarily misplaced during this project
Now let’s have a little honesty moment with the mess all around me in these fitting pictures. Our house is under renovation and my sewing space is also the kids playroom, our dining and living room and at this point I was most of the time sewing, hubby was renovating and kids were generally being lazy with picking up. Sewing on a tight deadline really makes my house a gigantic mess but that’s ok. I don’t have to be perfect even on the internets 🙂
then onto sewing those side back seams and side pleats down that is all fitted on me so I had to trust in my hubby for this bit. Really he is a good sport for doing all this but it is always a bit nerve wrecking because though he has good eye for things he is not a sewist.
Now I know I’m not going into much detail on the construction but I think the american duchess guide is so well written that I don’t really have anything to add. The only bit I really didn’t get was what to do with the skirts in the front after sewing it down to the bodice. What I did was fold them down extra bits and turn the ends inside. Now if I had a tightly woven taffeta I would probably just left the edge raw or possibly pinked it but my silk frays lik crazy so I folded them down on the inside to protect them.
here you can also see that the stitching on the inside is slightly wierd but that’s normal the important thing is that the top fabric is smoothed out on your body and sometimes that means things end up off center. We humans are not symmetric.
The sleeves I drafted with a more narrow fit similar to the 1780s sleeves I’ve done before but using the shape of the 1760s sleeves. At this point I hadn’t yet made up my mind about having sleeve ruffles, in the 70s gowns I looked at online and in paintings they seem to come in all the styles. Some slightly abore the elbow, some at elbow some below, some with a dip at the elbow some without, some with huge tiered ruffles some with just small tucker ruffles some completely without any. I decided to make them elbow length and straight so I could add the tiered ruffles if I felt like it after finishing the other decorations.
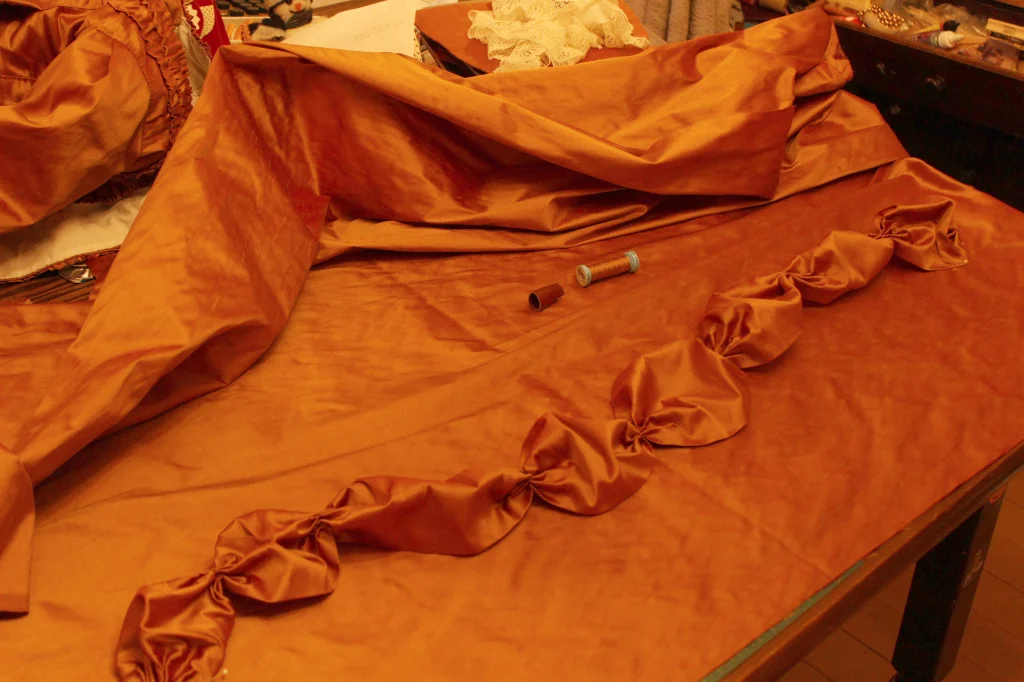
Now it was time for trimming! As you might have noticed I still hadn’t made my petticoat at this point, I had cut out the front and pinned it to the back piece but that was not cut out. The reason I did this was that the silk I found was little over 8.5 yards long with some staining at one corner so I wasn’t yet sure if it would be enough to make the all the trimming I wanted. So with the petticoat pieces pinned out I cut my trimming and sewed it to make sure I had everything I wanted and only then cut the petticoat so that if need be I could make the back piece of the petticoat out of something else. This was very common in the period, usually a linen in a similar color would have been used. I really didn’t want to deal with trying to find a linen in a similar color so I would have just used something in my stash, most likely the silk left over from my italian gown. Ironically it is actually more expensive and thicker than this one but it’s an odd leftover piece that is really too small for anything else and I already had it so better to use it than let it go to waste. For the same reason I faced my hemm with a cotton I had instead of the silk and just added silk on the edges were the fabric is likely to turn when I move.
This mix of materials turned out the be a serious pain to hemm. My needle just really didn’t want to go through the materials and I ended up hemming this thing for 2 days
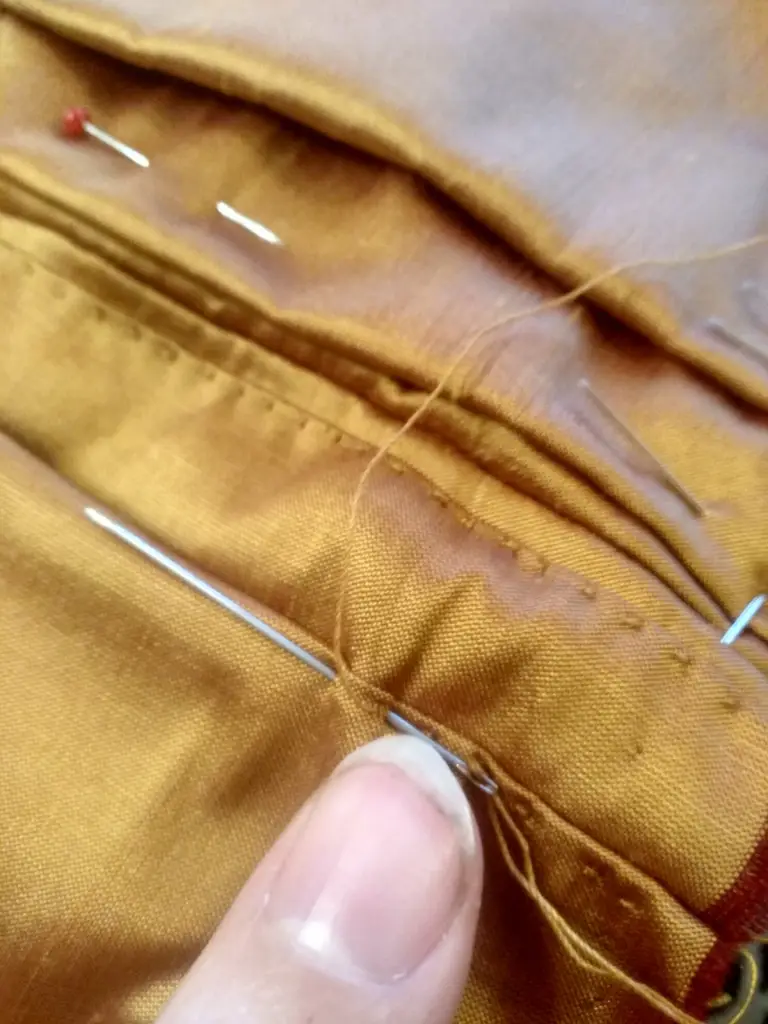
For the puff trim I cut my fabric into 6.5 inch wide strips folded about a half an inch down on all sides and iron them down. Then I took one short edge and sewed a loose running stitch onto the fold and pulled it to gather the fabric and stitched it down to edge of my bodice. I put the gown on my mannequin, turned my computer screen so that I could see the reference dress and started working. I running stitched one side of the puff down some way making sure the stitches were small on the outside and that the trim was in the right place. Then I took a separate thread and needle and sewed the gathering running stitch on the end of the puff and secured it, continuing with the running stitches to the end of the puff stitshing the gathering down and continuing up the other side a few stitches. Then I got some wool batting and stuffed the puff lightly, you want the puff to stay open but still lie fairly flat on the fabric. Then you stitch the rest of the puff closed. The reason why I did all this seing on the mannequin was that when you sew down the puffs you have costantly make sure the fabric is azt the right angle so that the puffs go in the direction you want them in but also so that the fabric isn’t too wide apart and pulling on the underlying fabric or too narrowly and making the puffs stick out too much. It does make sewing them down slightly slower and tougher on your back but gives you more control so there is less of a chance for mistakes.
When I came to the end of one strip I sewed it down as normal, took the next strip and gathered the edge and whip stitched the gathers together tightly. In the finished dress unless you look really really close the join is not visible so no need to bother with sewing them together first. I found this method easyer since then I didn’t have to do math to see how long the trim needed to be since that wavy pattern on it would have made that difficult.
Here you can also see the running stitches holding the trim down, since wool batting sticks to its self the stitches can be wider apart, it won’t come out so no need to fine stitching hereafter finishing one side I tried to copy it on the other side but they don’t need to be exactly the same, they aren’t on the original either 🙂
For the bodice I did a typical gathered trim with half the width of the puff trim. Since my fabric was not as tightly woven as a taffeta I turned the edges and sewed them down like on the original brocade gown instead of pinking. For the stomacker I did the gathered trim down the middle and a self fabric bow on top, I got the idea off another original gown but apparently when I found the picture in the middle of the night I didn’t save it anywere and now I have no idea were it was! 😀 I used some vintage cotton lace I had and made a tucker to go around the neckline of the gown with a separate piece going on top of the stomacker. This is basically just a piece of lace sewed on to a cotton tape with the lace pleated at random intervals and then the tape is tacked onto the gown and stomacker so that it can be easily taken off for washing or wearing with a differnt gown.
Ignore the side wrinkles apparently when getting dressed for the yule ball I hasn’t really paying attention to what I was doing and the gown was loosely on. Iäll get some proper pictures of this gown later and post them so that you can see her in her full glory.
At this point I still had some fabric left for the trimm for the petticoat so I cut both of my pieces out of the dress silk and trimmed the front of the petticoat. At this point I also decided to ommit the bows from my version. I think I made my puff trim wider than on the original so that the front was already pretty full so simple was better this time around. For the petticoat I decided to change the order of the trim layers and made the puff trim first, this one I sewed flat on the table.
Once I finished sewing the puffs on I changed my mind again, since this dress was fairly simple throughout I felt that adding more trim to the petticoat would kind of take away from the over all look. Now all that was left to do was sew the side seams up till the pocket slits and pleat the waistband. This time I followed the book’s instructions and cut the pieces to size using math but i have to admit I don’t like this method. I felt very unsure of the final result the entire time and I’m still not sure the hem is completely even all around. I prefer cutting the piece to the side hoop (or rump or what ever padding I’m wearing) length and the drape and pleat it on my mannequin. I feel the later way gives me more control over the pleating. But if you haven’t tried both methods of making a petticoat I suggest you try them out and see what works best for you, it really is a very personal preference thing there is no right or wrong here.
I’ll leave off with a few pictures from the Yule ball. My petticoat is on wierdly and my gown on too loose since apparently I don’t know how to dress myself without a mirror but that didn’t keep me from having a good time and makes the perfect excuse for a proper photoshoot in the near future so more pictures to come… 🙂
xxx
I made a christmas train pouf since it was a Yule ball, it’s highly in accurate as the first prototypes of trains happened in the 1780s and a working one didn’t become a reality till the early 19th century and my look is late 1770s but it’s in the spirit of the 18th century pouf so I just went for it ignoring accuracy.